
What if your ESP32 could control an LED with just a touch? That’s what we’ll explore today using its capacitive touch pins. By combining simple touches with precise brightness control, we can turn a single LED into an interactive, dimmable light that responds instantly to your touch.
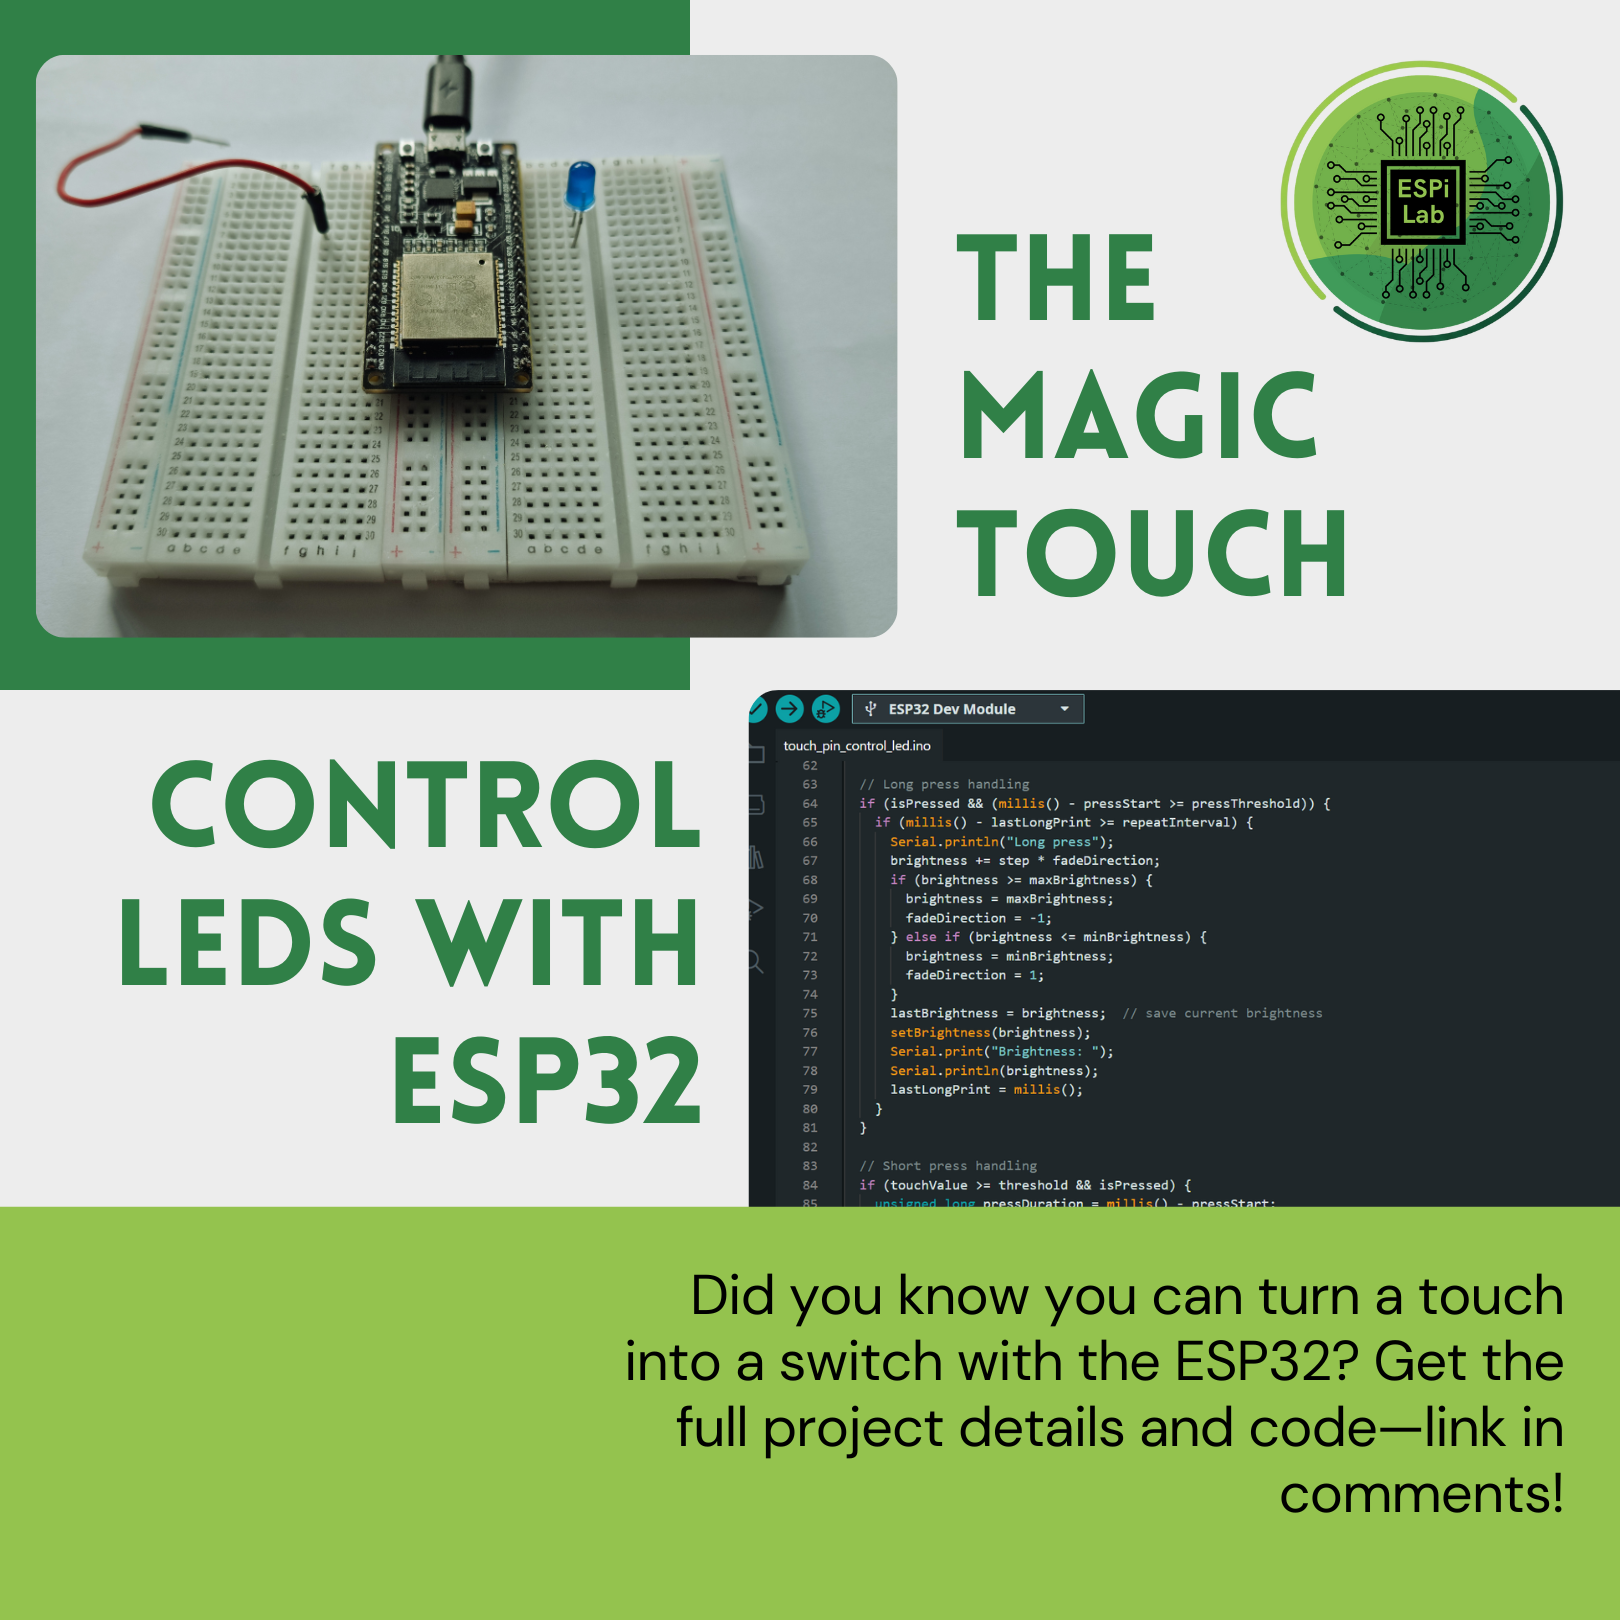
Your goal is to create an interactive LED using the ESP32’s capacitive touch pin. When you briefly touch the wire connected to the pin, the LED will toggle on or off. When you hold the touch longer, the LED will gradually increase or decrease its brightness within a set range. By using the ESP32’s touch capabilities, you’ll learn how to detect short and long touches, control LED brightness smoothly, and make a simple project feel truly responsive and interactive.
Subscribe to our newsletter to get fresh project ideas and updates directly to your inbox.
The ESP32 is a low-cost microcontroller with Wi-Fi and Bluetooth, perfect for IoT projects.
Stepper motors move in precise steps, making them ideal for position control in robotics and automation.
A distance sensor measures how far away objects are, often using infrared or ultrasonic technology.
Radar-like scanning helps visualize surroundings by combining distance measurements at different angles.
Step 1: Wiring – For the VL53L0X distance sensor, connect SDA → GPIO 21 and SCL → GPIO 22 on the ESP32. For most other I²C distance sensors, the wiring is the same (SDA/SCL). Make sure you also connect power (3.3V) and GND.
// VL53L0X wiring example
SDA → GPIO 21
SCL → GPIO 22
VCC → 3.3V
GND → GND
Step 2: Setup Code – We include the VL53L0X library and the TemplateUI class, which is a paid component that saves you hours of time when doing any async web server: TemplateUI. In setup(), the sensor is initialized and the UI started. This part is similar across most distance sensors.
#include "TemplateUI.h"
#include <Adafruit_VL53L0X.h>

Adafruit_VL53L0X lox;
TemplateUI ui;

UIComponent uiComponents[] = {
  { "HorizontalBar", "Distance_cm", 110 },
  { "HorizontalBar", "Speed_cm/s", 100 }
};

void setup() {
  Serial.begin(115200);
  if (!lox.begin()) {
    Serial.println("Failed to boot VL53L0X");
    while(1);
  }
  ui.begin("ssid", "password", "dark", uiComponents, 2);
}
Step 3: The Loop (Main Logic) – This is the most important part. Each loop iteration:
1. Read the current distance.
2. Calculate elapsed time since last reading.
3. Compute speed as |current − last distance| ÷ Δt.
4. Update the dashboard bars for distance and speed.
This logic can be reused with almost any distance sensor, as long as you can measure distance in cm.
void loop() {
  VL53L0X_RangingMeasurementData_t measure;
  lox.rangingTest(&measure, false);

  float distance_cm = 0;
  float speed_cm_s = 0;

  if (measure.RangeStatus != 4) {
    distance_cm = measure.RangeMilliMeter / 10.0;

    unsigned long now = millis();
    float dt_s = (now - lastTime) / 1000.0;

    speed_cm_s = abs(distance_cm - lastDistance) / dt_s;

    lastDistance = distance_cm;
    lastTime = now;
  }

  ui.updateData("HorizontalBar", "Distance_cm", String(distance_cm));
  ui.updateData("HorizontalBar", "Speed_cm/s", String(speed_cm_s));
  delay(100);
}
Step 4: Full Code – Here’s the full code for reference, so you can see how all the pieces fit together:
/*
  ESPiLab Project: Distance & Speed Monitor using VL53L0X

  This project was created by Martin Dolejší for the ESPiLab platform.
  You can modify it as you like, but the project uses the TemplateUI class,
  which is a paid component. To use TemplateUI, you need to purchase it here:

  https://espilab.gumroad.com/l/esp32-asyncweb-template

  The code displays two horizontal bars:
    - Distance_cm: current distance in cm from VL53L0X
    - Speed: movement speed in cm/s
*/

#include "TemplateUI.h"
#include <Adafruit_VL53L0X.h>

Adafruit_VL53L0X lox = Adafruit_VL53L0X();
TemplateUI ui;

// Define UI components
UIComponent uiComponents[] = {
  { "HorizontalBar", "Distance_cm", 110 },
  { "HorizontalBar", "Speed_cm/s", 100 }
};

// Variables to calculate speed
float lastDistance = 0;
unsigned long lastTime = 0;

void setup() {
  Serial.begin(115200);
  while (!Serial) { delay(1); }

  if (!lox.begin()) {
    Serial.println(F("Failed to boot VL53L0X"));
    while(1);
  }

  // Start UI
  ui.begin("ssid", "password", "dark", uiComponents, 2);

  lastTime = millis();
}

void loop() {
  VL53L0X_RangingMeasurementData_t measure;
  lox.rangingTest(&measure, false);

  float distance_cm = 0;
  float speed_cm_s = 0;

  if (measure.RangeStatus != 4) {
    distance_cm = measure.RangeMilliMeter / 10.0;  // convert mm → cm

    unsigned long now = millis();
    float dt_s = (now - lastTime) / 1000.0;       // elapsed time in seconds

    speed_cm_s = abs(distance_cm - lastDistance) / dt_s;

    lastDistance = distance_cm;
    lastTime = now;
  }

  // Update UI
  ui.updateData("HorizontalBar", "Distance_cm", String(distance_cm));
  ui.updateData("HorizontalBar", "Speed_cm/s", String(speed_cm_s));

  delay(100);
}